SEO optimizing your blog posts in WordPress is a must-do for earning rankings, wooing targeted traffic, and nabbing blog ROI.
After all, if you spend all that time producing a wonderful piece of content, you need to give it legs to stand on.
Without SEO, you’ll put that blog at a disadvantage from the start.
On the other hand, optimize correctly, and Big Things are more likely to happen. (See our case study below of ranking for a super-hot keyword in 30 days.)
If your blog is set up in WordPress, SEO optimizing a blog post before publishing is incredibly easy to do.
You just need to know what to do.
Here are the 8 steps to use every single time you publish a post to thoroughly hit all those “SEO check marks.” As you’ll see, you can optimize every single element of your blog — from top to bottom – and get more out of every blog you publish.
(Note: While this how-to applies to WordPress, specifically the classic editor, you can take these general steps and use them with whatever publishing platform you please.)

How to SEO Optimize Blog Posts in WordPress: 8 Steps
1. Edit and Proofread Your Blog Post
2. Add Relevant Images to Your Blog
3. Format Blog Content for Readability and SEO
4. Add Easy One-Click Social Sharing Codes
5. Check Your Links
6. Include a CTA
7. Optimize and Add Meta Title and Description with Yoast
8. Optimize Your Blog for Social Sharing with Yoast (Yes, Yoast Does That!)
Why SEO Optimize Your Blogs in WordPress? A Case Study
Why take all the trouble to search engine optimize your blogs?
Like we referenced earlier, Big Things Will Happen.
Case in point.
We have over 1,300+ blogs published on the Express Writers’ Write Blog across ten years, which have earned over 21,000 keyword positions in Google (case study here). 90% of the blogs I write and publish here start with a keyword search. If I can map the keyword to ROI, we take it into the blog creation stages.
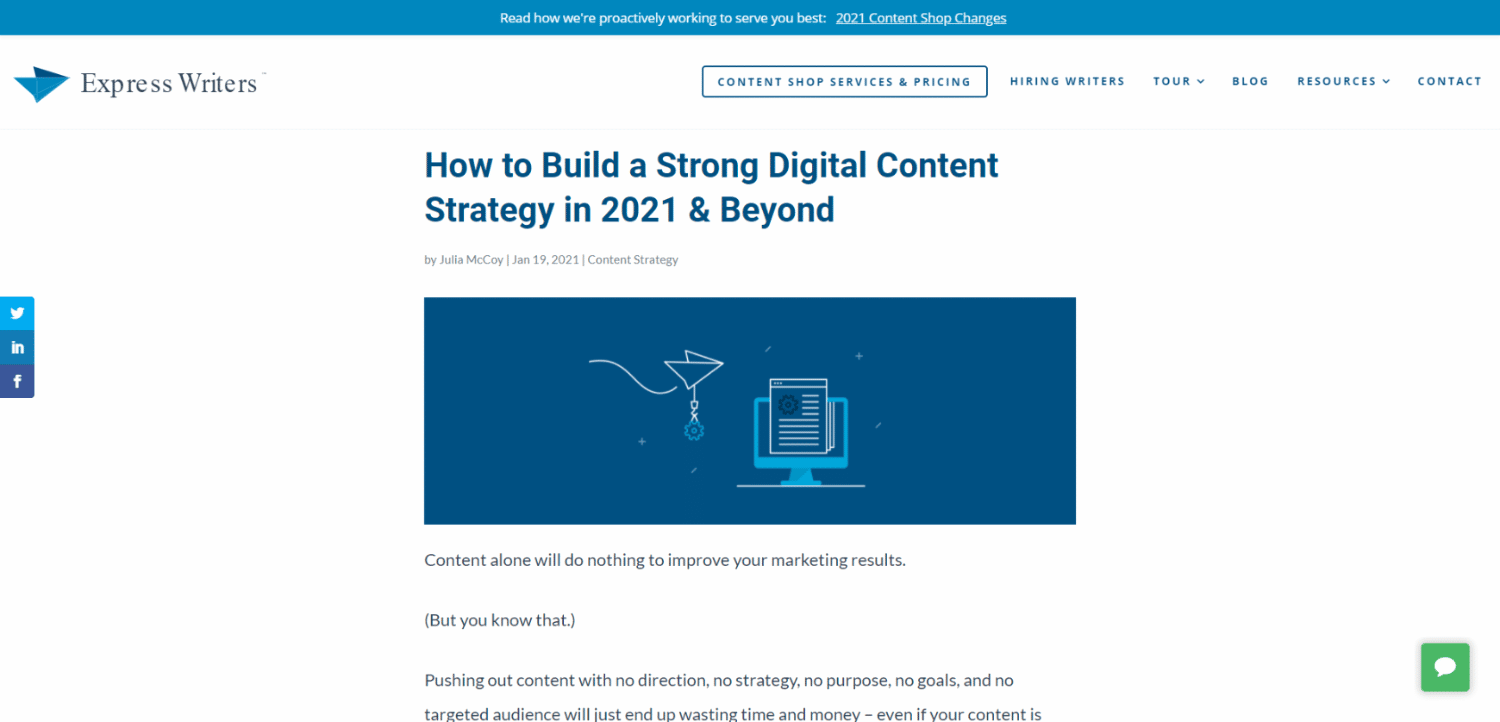
Here’s a specific blog post example. We have earned a #1 organic ranking and featured snippet for the keyword “how to build a digital content strategy.” (Even our custom-designed images for the blog are ranking in Google Images!)
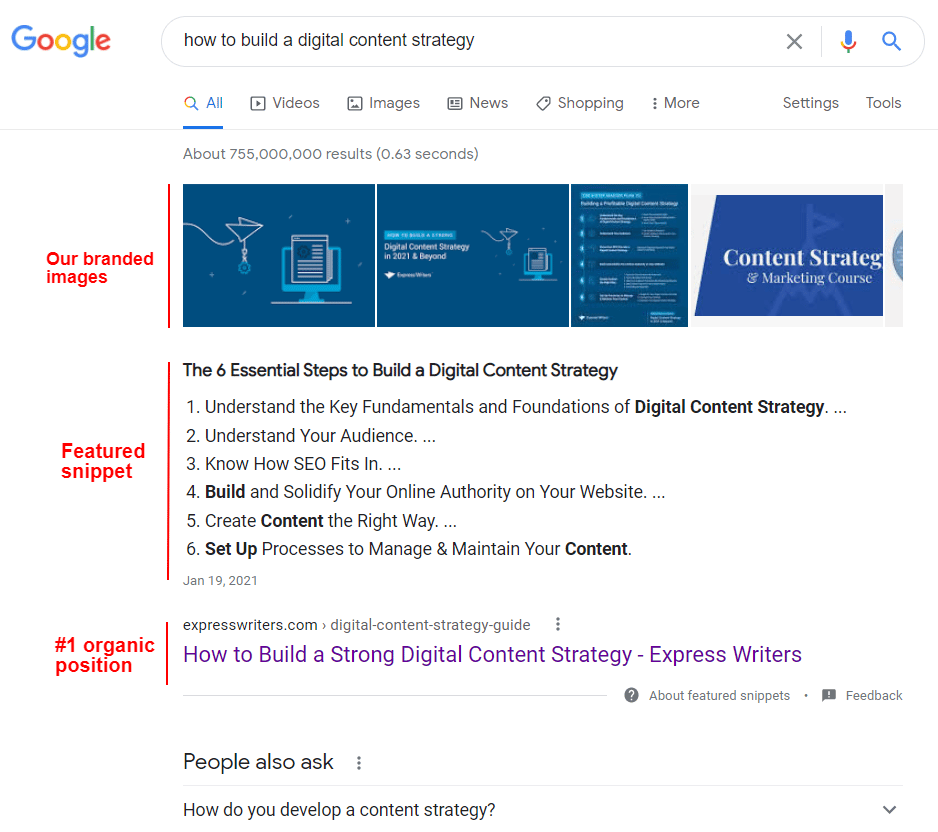
One key player for this blog’s ranking power is the work we did on optimization before publishing. From the title to the copy to the subheaders to the images, CTAs, links, metas, and more, everything is optimized for search engines.
Search success is a big deal, but I don’t need to tell you. Over and over, brands that edge into top positions on SERPs get the lion’s share of the spoils, including higher click-through rates and more traffic.
Need great content to fuel your blogging presence? We offer packaged blogging plans. See pricing here.
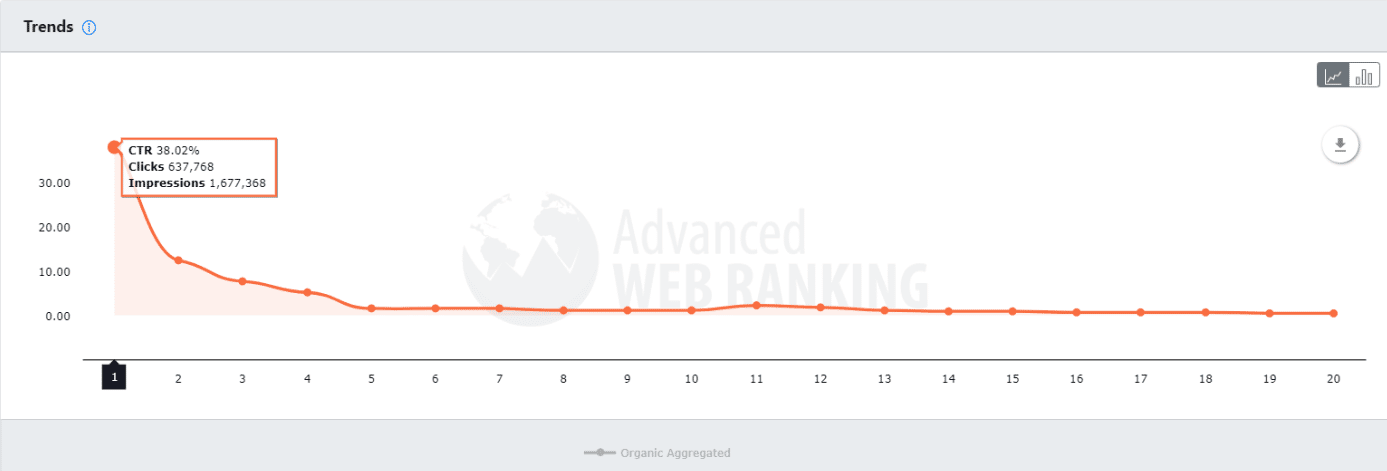
According to Advanced Web Ranking, the CTR for organic position 1 on Google is 38.02%. Meanwhile, the CTR for position 10 is 1.13%.
Google alone processes over 40,000 search queries every second. If your brand isn’t present on the search landscape, you’re missing out on a huge piece of the traffic pie.
So, that begs the question: Are you covering all your SEO bases? Are you optimizing everything you can optimize to give your blogs their best chance?
How to SEO Optimize Blog Posts in WordPress: The “How-To” of Each of Our 8 Steps

1. Edit and Proofread Your Blog Post
First up: Make sure your blog is edited and proofread for typos.
You want a clean, error-free blog post for obvious reasons. (Google says the quality of your content directly impacts your rankings. More on their E-A-T, or Expertise, Authoritativeness, and Trustworthiness factors.)
A quick scan with your two eyeballs will usually suffice, but if you’re not the best editor, hand this task off to a trusted second party.
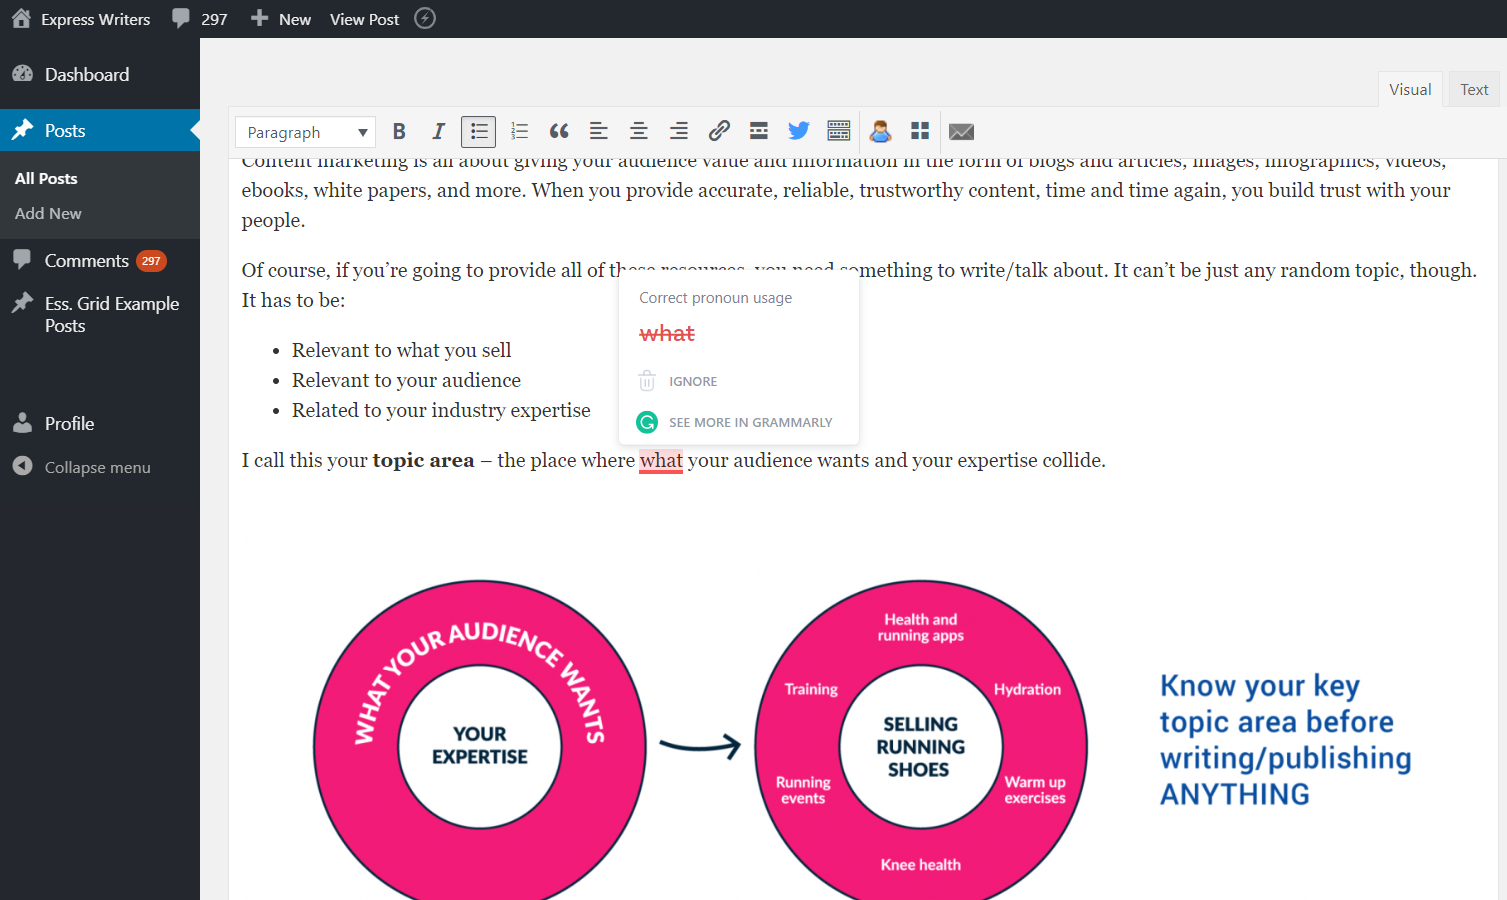
Or, install the Grammarly Chrome extension to check your grammar and spelling right inside the WordPress editor.
2. Add Relevant Images to Your Blog
After editing, it’s time to add and optimize relevant images.
If you’re working from a draft, you should be able to add them into WordPress without a problem. Just place your cursor where you want the image to go, then drag it straight into the editor.
Once you’ve got pictures placed within your post, optimizing them goes like this:
- Make sure they’re inserted correctly. Don’t place images so they mess with your paragraph formatting, and keep your image placement consistent (e.g. centered, in-between paragraphs).
- Images should be original size to ensure they’re clear and crisp. Only size down if they’re huge or the file size is bloated (anything over 4-5 MB usually can be scaled back without sacrificing quality).
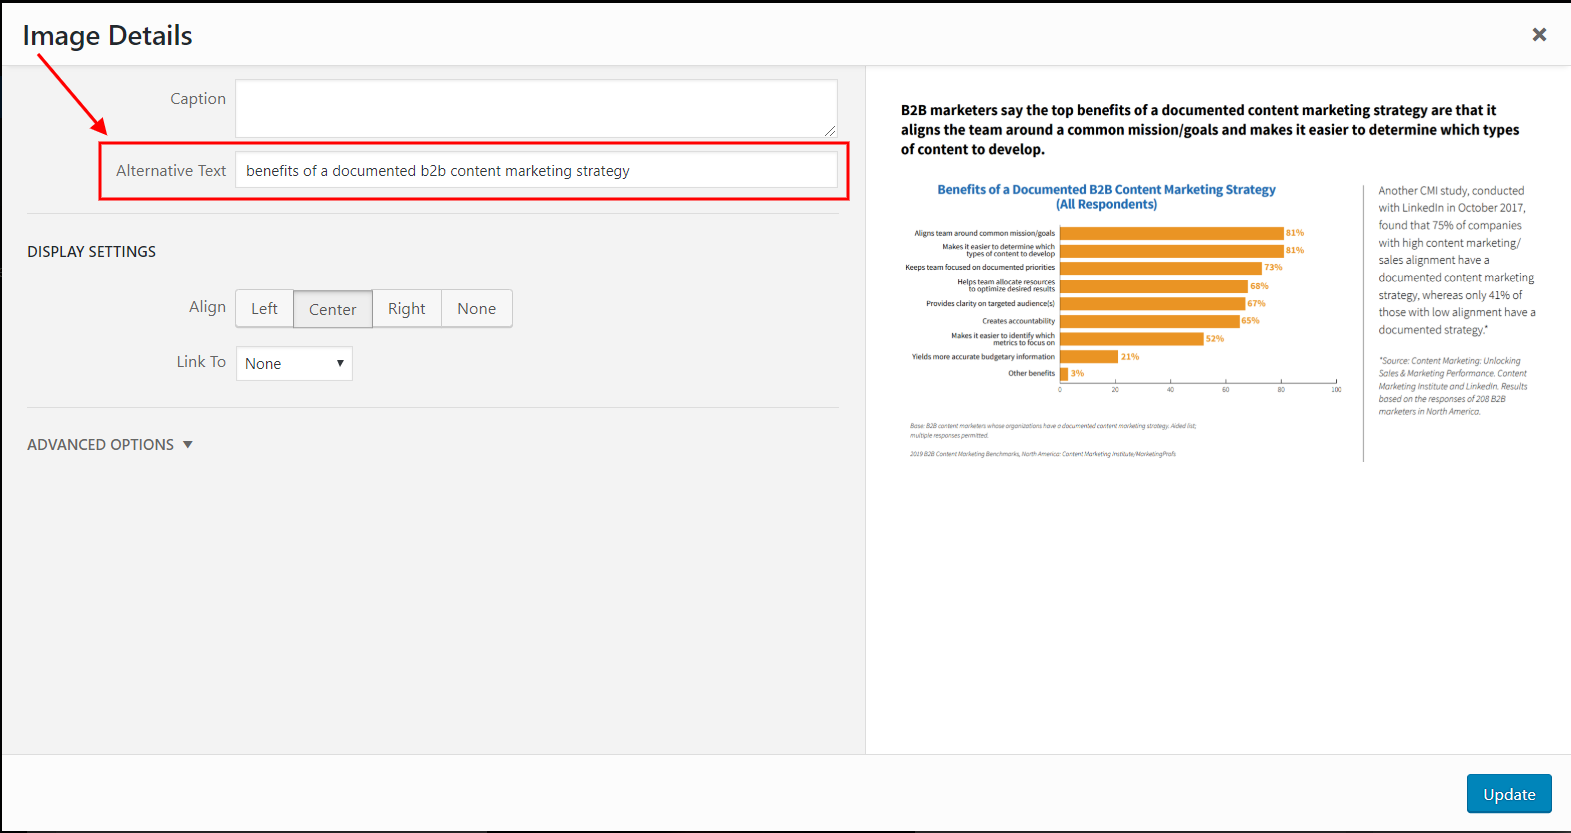
- Add alternate text to every image. This is important for rankings! Alternate text is a descriptive text that provides context for people who are visually impaired or need to use a screen reader to browse the web. Alternate text (or “alt text”) describes your images to search engines, as well, so they’ll potentially show up in image searches. This is exactly what we saw with our own blog post from the aforementioned case study we talked about.
- To add alt text to an image in the WordPress editor, click the image. A toolbar will pop up – click the “Edit” icon (the pencil) to add image properties like alt text.

3. Format the Content for Readability
Another must-do for SEO is formatting your blog posts for readability. These are the top considerations so people (and search engines) can read and understand your post easily:
- Above all, be consistent. If you use auto-formatted bullet points, use them every time you need a bulleted list. If you format your subheaders with numbers, keep doing it throughout the post. Formatting consistency keeps things looking neat and clean, not to mention easier to read.
- Fix your spacing. Remove double spacing after periods, add more paragraph breaks where your text looks dense, and ensure spacing around images is consistent.
- Make sure all H2s, H3s, etc. are coded correctly (use WordPress’s formatting!).

4. Add Easy One-Click Social Sharing Codes
For us at the Write Blog, Twitter is a huge platform for engagement. We’ve kept up a Twitter chat, #ContentWritingChat, for years now on Twitter that has helped us grow a solid Twitter presence.
So, knowing Twitter is a hot platform, we’ve chosen to use a plugin that enables us to add “Click to Tweets” to every post — which we do. These are punchy phrases or takeaways from the blog that readers can share to Twitter with one click.
- Step 1: Know your platform (for us, that’s Twitter).
- Step 2: Add a plug-in to your blog that will allow you to add manual shortcodes to every blog post that makes sharing super easy.
- Step 3: Avoid sharing CTTs too early in a blog. I’ve seen this directly negatively impact us earning a Featured Snippets ranking! Don’t put too much code, or “stuff” above your first H2s and H3s.
To add your social-sharing codes, this couldn’t be easier – we use the Better Click to Tweet plugin for WordPress. This adds a little Twitter bird icon to the top of your WordPress editor. Click it to pull up this generator:

It will add Click to Tweet boxes to your blog post drafts with the correct code. When you publish, it will look like this:

Some tips for adding Click to Tweets to your posts:
- Get creative! Sure, you could copy a bit of text straight from the blog, but why not reword it to make it more impactful, punchy, and/or powerful?
- Make sure your tweets are readable. Eliminate any clunkiness.
- Add emojis. A split test by Larry Kim of WordStream found that including an emoji in tweets increases engagement by 25.4%.
- Don’t add them too early in your blog post to avoid messing with blog post SERP readability.

5. Check Your Links
Next up: Check those links.
- For every link in your blog – whether it points to another site or links internally to your other blogs or web pages – make sure it works.
- Broken links are a BIG no-no.
- After that, make sure all links pointing off-site are set to open in a new window. That way, you won’t be directing readers off-page.
To edit a link in WordPress, click the link text. A toolbar will pop up. Then click the “edit” icon. (WordPress consistently uses the pencil icon ✏ to denote editing settings for any element.)
Your link will become editable text and a gear icon will pop up. Click it to access “Link options.”
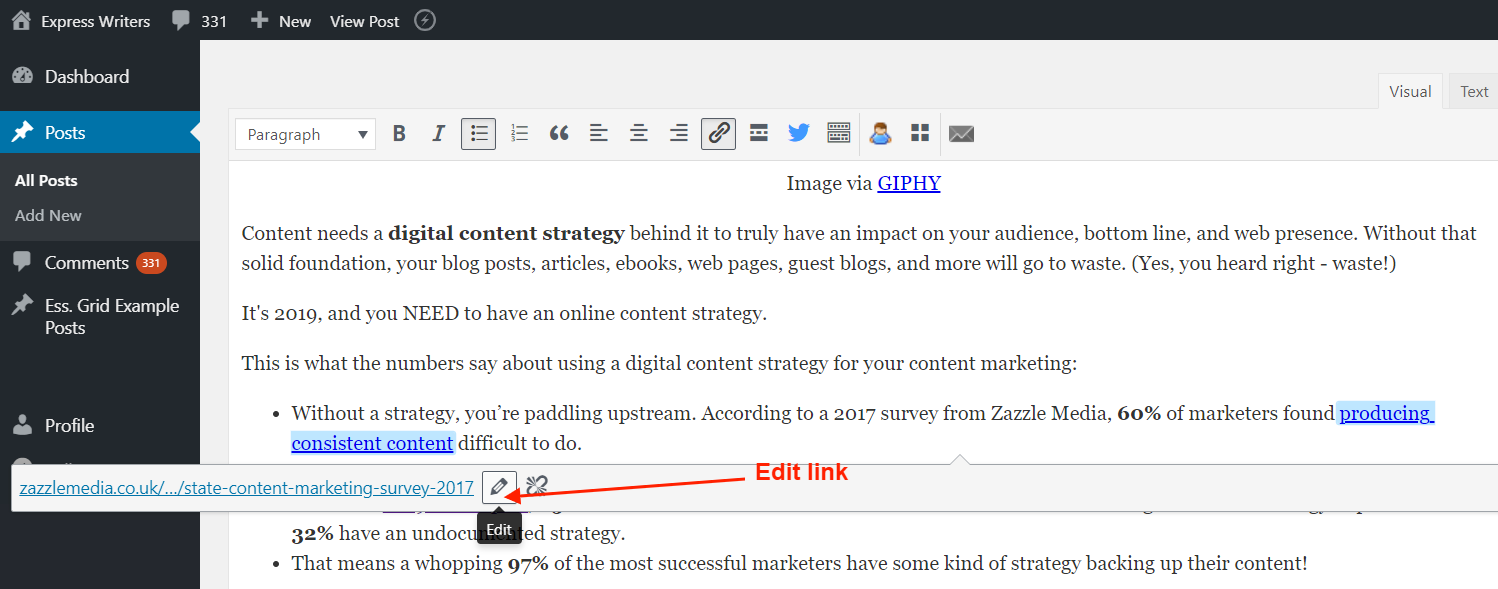

Make sure the box next to “Open link in a new tab” is checked.

If you’re using the WordPress Block editor, this process is a smidge easier. All you have to do is click your link, then click the slider next to “Open in new tab”.

Need great content to fuel your blogging presence? We offer packaged blogging plans. See pricing here.
6. Include a CTA
After you check the links, scroll to the end of your blog and make sure a CTA (call-to-action) is there.
At least one CTA in this location is key because it tells the reader what to do after they’ve finished consuming your awesome content. If you managed to build trust along the way, you don’t want to let that fly out the window. The CTA helps you capture the trust you’ve built and leads the reader into your marketing lifecycle.
On the Write Blog, every single post gets its own CTA. Sometimes it’s a text version with a link to one of our product pages, and sometimes it’s a clickable banner CTA, like the one below:
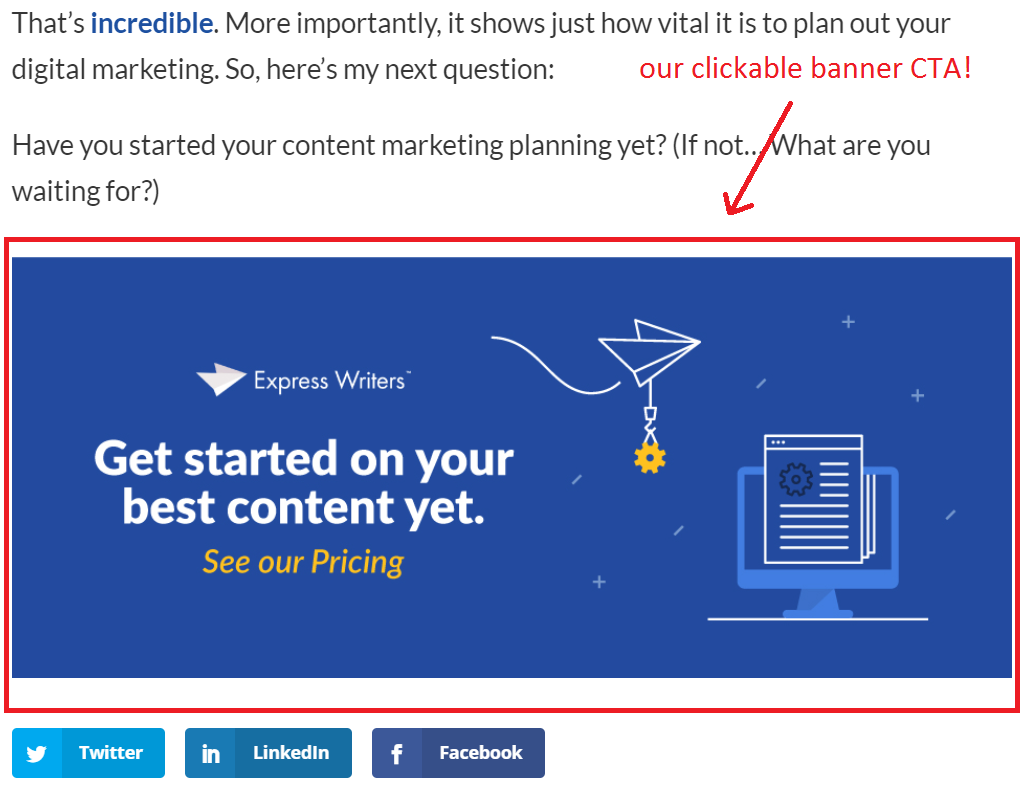
This one links to our pricing page. As long as you draw the reader further into your circle and the link is relevant to your post topic, your CTA can point to any internal page you want.

7. Add Metas
We’ve reached the last few steps for optimizing your blog for search. Don’t get lazy, though: These final ones are major.
At this point, it’s time to add a strong and unique meta title and meta description.
- The meta title WILL show up in Google search results. Make sure it includes your focus keyword so the term you want to rank for signals straight away.
- The meta description may or may not show up in search results. It’s still important to create one that’s the right length, properly summarizes the post, and includes your focus keyword.
A great way to add metas to all your posts in WordPress is to use the Yoast SEO plugin. We use this to optimize all our posts on the Write Blog.
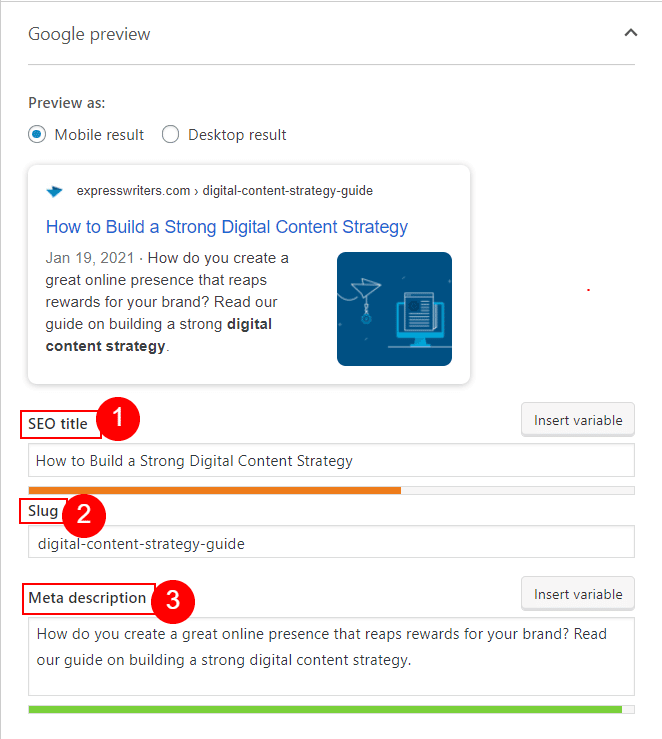
Once the plugin is installed, scroll all the way to the end of your post in the WP editor. There you’ll find the Yoast SEO options, including a snippet preview of what your post will look like in Google SERPs. To edit the metas, head to the section called “Google preview” (you may need to click on it to expand it).
Now you can add:
- Your optimized SEO title (also called the H1 or header)
- A URL slug (a short string of text that describes the page – this text string follows the domain extension in the URL, e.g. https://yoursite.com/page-description-goes-here)
- A meta description (a short summary, up to 158 characters, of what the page/blog is about – it’s a good idea to use the focus keyword in this description and put the most important text at the beginning)
What About WordPress Categories and Tags?
I get plenty of questions constantly about WordPress categories and tags. Should you use them? Do they matter?
Yes and yes, but with caveats.
In general, categories and tags help you organize your blog posts on your site. They’re good for internal organization and optimization. That simply means, when you categorize each of your blog posts and add a few relevant tags, you help users on your site navigate your blog, find topics they’re looking for, and find related blog posts.
Since categories and tags are so helpful for the user, in theory, they’re also good for SEO. In the same way these elements help users, they also help search engine crawlers by providing information about related content, your site’s structure, and more.
BUT —
Don’t overthink them, and don’t put too much emphasis on them.
In my experience, after lots of testing and experimentation, they barely affect SEO much, if at ALL. That’s why I say, when dealing with categories and tags, the simpler the better.
- Categorizing your posts helps users and Google find what they’re looking for, so don’t skip it. Create overarching categories that describe the topics your blog covers. For each post, choose one category that fits the topic best. For example, for our post on how to build a digital content strategy, we filed it under the “Content Strategy” category.
- Tagging your posts with a few relevant tags based on your keyword research helps with SEO, according to Theme Grill. In my experience, it’s good practice and can’t hurt. For the Write Blog, we keep it super simple and add our focus keyword as a tag, plus one or two additional related keywords as tags. (You do NOT need 10+ tags for each post! It’s overkill and just wastes time.)

8. Optimize Your Blog for Social Sharing with Yoast (Yes, Yoast Does That!)
Final step! Ensure the right image is shared with your post link on social media by completing this step. This is especially important if you’ve created custom, share-worthy graphics to accompany the post.
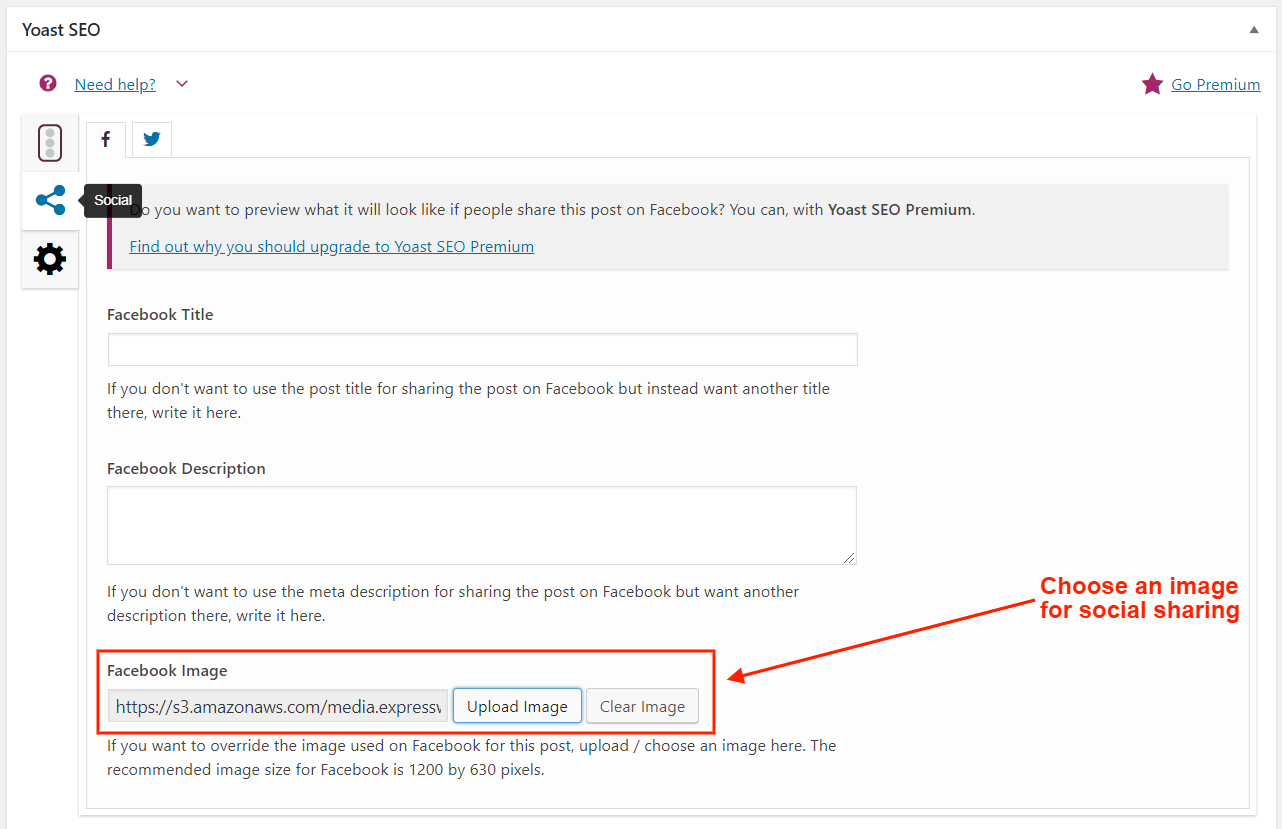
- In the Yoast SEO options, click on the “Social sharing” icon.
- Skip over the title and description fields – Yoast will pull the information for these from the main snippet fields you already filled out in step #7.
- Scroll to “Facebook image” or “Twitter image.” Upload your custom image here to make sure it’s shared with your link when people click one of your social share buttons.
- Make sure the image you use has an alternate text and a title specified. You can add these by selecting the image in your media library.
This step keeps all of your social shares looking snazzy and professional, no matter who shares your post. This could be the difference between zero clicks and lots of clicks, so don’t skip it!
Just Publishing Your Blog Isn’t Enough: SEO Your Blog Posts for Better Results
Taking care of all these small pieces of your blog post may seem like busy work, but it’s not.
Instead, each step is essential for making your content the best version of itself. Attention to detail may be the differentiator between two posts vying for the #1 or #2 spots on a SERP. If your post has better signals, both readers and Google will take note.
The devil is in the details. A sharp eye and a few extra minutes of your time before hitting “publish” could make all the difference.
Need great content to fuel your blogging presence? We offer packaged blogging plans. See pricing here.